There’s nothing quite as thrilling as watching your child take their first karate class.
The discipline and confidence that come with this martial art can have a profound impact on young minds. But before your little one can start mastering the kicks and punches, you’ll need to master the art of tying a karate belt.
Tying a karate belt may seem like a small detail, but it’s an essential part of the karate tradition that can bring both you and your child immense pride. In this article, we’ll walk you through the steps of tying a karate belt on a child and provide some tips to make the process fun and enjoyable.
Our guide will cover everything from basic knot-tying techniques to variations based on your child’s specific style of karate. We’ll also delve into proper folding and storing techniques for your child’s belt, as well as the significance behind different belt colors.
We know that getting children excited about tying their belts can be challenging, so we’ve included some creative ways to make it an engaging part of their karate journey.
In this article, you’ll have all the knowledge and confidence you need to turn your child into a true karate belt-tying pro.
Prepare the Uniform and Belt
That’s why preparing the uniform and belt is an important step in tying a karate belt on your child.
Not only does it ensure that your child looks neat and tidy, but it also helps to maintain hygiene during training. As a martial arts expert, I’m here to guide you through the steps to prepare the uniform and belt for your child.
First, start by cleaning the uniform. A clean uniform not only looks neat but also helps prevent any infections or diseases that could be caused by bacteria or germs. Make sure that the uniform is properly washed and ironed before your child wears it.
Next, adjust the uniform to ensure that it fits your child well. An ill-fitting uniform can cause discomfort and hinder movement during training.
Check that the sleeves, pants, and jacket are of the right length for your child.
Before tying the belt around your child’s waist, make sure that there are no knots on it.
If there are any knots, untie them before proceeding.
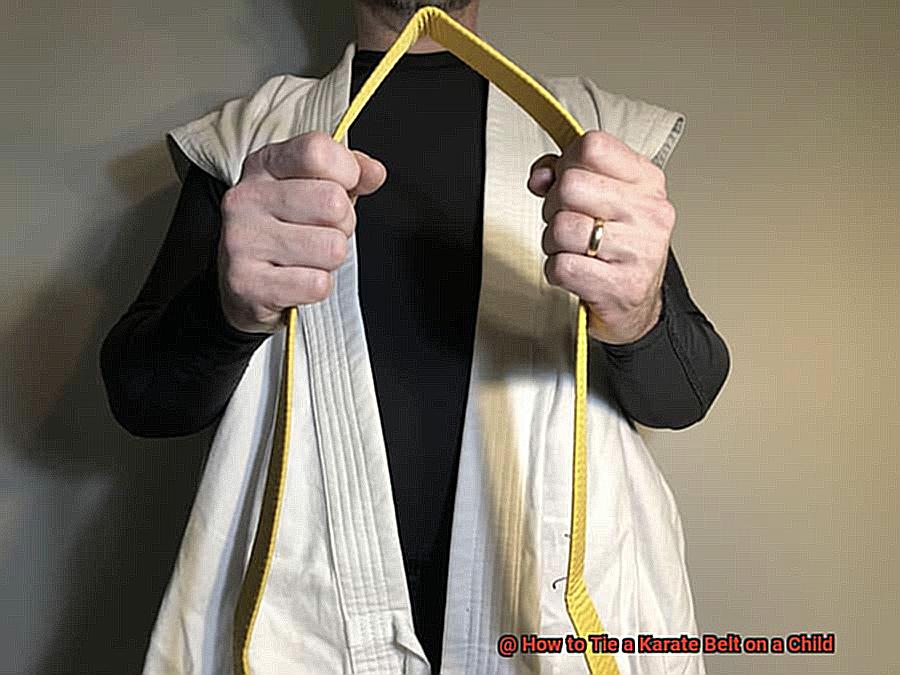
Then, fold the belt in half to find its center point. This will help you position it correctly around your child’s waist.
Now it’s time to position the belt on your child’s waist. Place the center of the belt on their stomach, just below their navel, ensuring that both ends of the belt are of equal length.
To tie the knot, take the end of the belt on the right side and cross it over the left side of the belt at the center of your child’s waist. Then make a loop with the end of the right side over both layers of the belt.
Take the end of the left side of the belt and place it over both layers of the right side loop before bringing it up and through the center of both layers of the belt. Tighten both ends of the belt by pulling them away from each other until it fits snugly around your child’s waist.
The knot should be placed off-center to one side, usually on the left side. Finally, adjust any folds or twists in the belt to ensure that it is flat and even all around.
Cross the Belt at the Center
And when it comes to tying the belt, crossing it at the center is a crucial step in the process that you simply can’t ignore.
Not only does it ensure that the uniform stays put during practice, but it also adds a polished finishing touch to their overall appearance. To start, take the middle of the belt and hold it against your child’s waistline with both hands.
Make sure that the label or emblem on the belt faces outward. Next, wrap one end of the belt around your child’s waist and bring it back to the front so that it overlaps with the other end by about six inches.
Now, take the other end of the belt and cross it over the first end at the center of your child’s waist. Make sure that both ends are now even in length before bringing them around to your child’s back and tying a knot.
But why exactly is crossing the belt at the center so important? Well, it’s not just for aesthetics or functionality – it has significant symbolic meaning in karate.
Crossing the belt signifies respect for tradition and humility, two fundamental values in martial arts. By following this simple yet profound step, you’re instilling these values in your child from an early age.
Think of it as a reminder to your child to always approach their training with respect and humility. These values will serve them well both on and off the mat.
By crossing their belt at the center, you’re not only ensuring that their uniform stays put but also setting them up for success in their karate journey. In conclusion, tying a karate belt is more than just a functional step – it’s an opportunity to instill important values in your child from an early age.
Create a Loop with the Right Side
By mastering this technique, you’ll be well on your way to teaching your child valuable lessons in discipline and respect.
To get started, take the right side of the belt and lay it over the left side while ensuring that the left side remains flat against your child’s abdomen.
At this point, the right side should be longer than the left.
Next, bring up the right side of the belt and loop it over both layers of the left side to create a loop about 8-10 inches long.
This loop should be positioned just below your child’s navel, and it should be loose enough to allow you to pass the ends of the belt through later on.
Now, hold the loop securely with your left hand while you take both ends of the belt in your right hand.
It’s crucial to ensure that both ends are even before proceeding to tie the knot.
Place Left End Over Both Layers of Right Side Loop
While seemingly straightforward, this step is crucial in ensuring that your child’s belt stays securely in place during training.

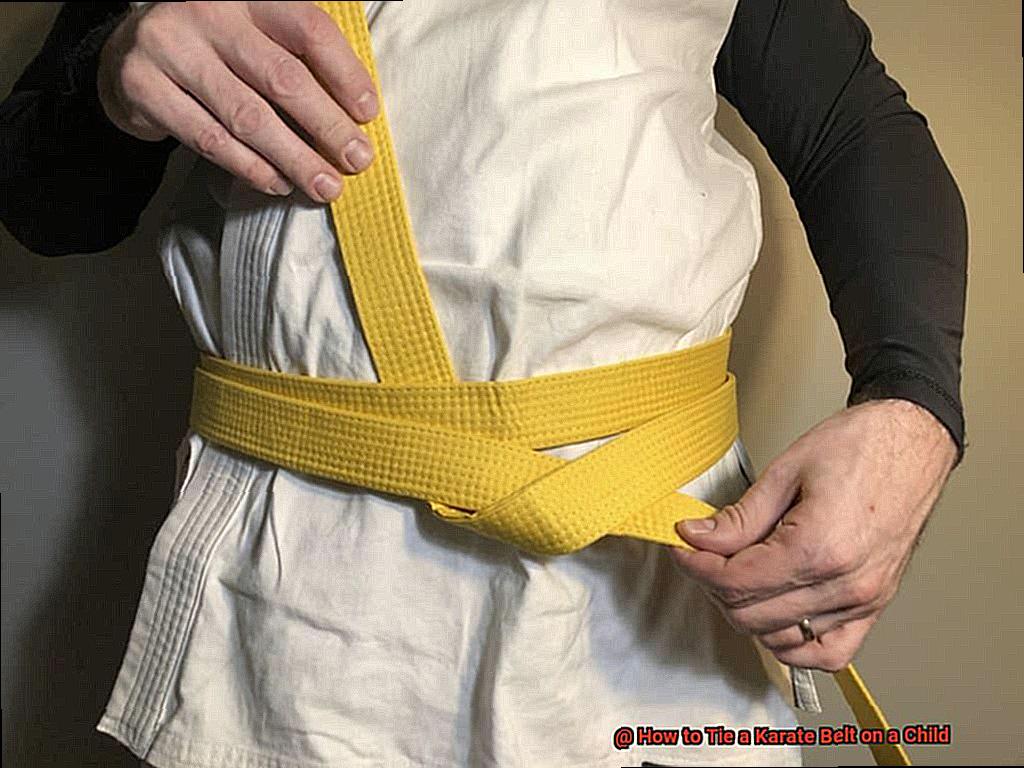
To start, take the left end of the belt and lay it flat against both layers of the right side loop. Your left hand should hold the left end while your right hand keeps the right side loop steady.
It’s essential to check that the belt isn’t twisted as you lay the left end over both layers of the right side loop. You’ll want to create a horizontal line across the front of the belt with the left end lying flat against both layers of the right side loop.
Once you’ve laid the left end over both layers of the right side loop, feed it under both layers of the belt and pull it tight. Remember to ensure that the knot is snug but not uncomfortably tight for your child.
Also, make sure to center the knot in the middle of your child’s body and avoid having it off to one side.
While this step may take some practice, with persistence, you’ll become an expert in no time.
Pull Both Ends Away from Each Other to Tighten
One of the most critical steps in this process is pulling both ends away from each other to tighten the knot.
It’s essential to ensure that the belt is snugly in place during practice or competition, and yet not so tight as to restrict breathing or movement. Think of it as armor for your child – if the belt is loose, it can leave them vulnerable to injury, but if it’s too tight, it can hinder their performance.
To properly tighten the belt, have your child hold onto one end with one hand and the other end with the other hand. Then, using equal force, they should pull both ends away from each other until the knot is snugly in place.
By paying attention to this small but vital detail, you’re helping your child develop skills that are foundational to the martial arts. As they grow in their practice and competitions, they will appreciate the confidence that comes with knowing they are correctly tied and ready for action.
Adjust Folds and Twists in Belt for Even Fit
One crucial step is adjusting the folds and twists in a karate belt for an even fit on a child.
It’s like making sure your shoes are tied tightly before a race – you want to make sure everything is secure and comfortable. To begin, position the center of the belt over the child’s belly button.
Then, create two loops by passing one end over the other and threading it underneath both layers. Ensure that both loops are the same size and adjust them so that they sit evenly on either side of the center of the belt.
Now, let’s get twisting. Cross each loop over the other to create a knot that will stay firmly in place during training.
Finally, adjust the folds of the belt by pulling on each layer until it sits flat against the child’s waist. This ensures that the belt won’t bunch up or sag during training, allowing for maximum mobility.
Just like a knight carefully adjusts their armor before battle, take the time to adjust your child’s karate belt for an even fit before they step onto the mat.
_5Plf5hyKiw” >
Conclusion
In conclusion, tying a karate belt on a child is a crucial aspect of martial arts that instills discipline, respect, and confidence in young minds.
By following the simple steps outlined in this article, you can ensure that your child’s uniform and belt are prepared correctly and tied securely. To tie the perfect knot, remember to cross the belt at the center as a sign of respect for tradition and humility.
Then create a loop with the right side of the belt, place the left end over both layers of the right side loop, and pull both ends away from each other to tighten the knot. It’s also important to adjust any folds or twists in the belt to ensure an even fit.
While it may seem like a small detail, tying a karate belt presents an opportunity to teach your child valuable lessons in character-building while ensuring their safety during training. Making it fun and engaging for your child can turn this process into an enjoyable part of their karate journey.
As they progress in their practice and competitions, they’ll appreciate knowing they’re correctly tied and ready for action.